By Liv Banks • Published: March 03, 2026
This almond flour pie crust recipe has become one of my go-to foundations for both sweet pies and savory pie fillings.
I use this pie crust for cheesecakes and quiches, and even gluten-free apple pies.
I originally developed this almond flour pie crust because I have many clients dealing with gluten sensitivity.
After testing different ratios, thicknesses, and bake times, I refined this version specifically for a standard 9-inch pie plate. It’s sturdy, lightly nutty, and reliable — without tasting dry or bitter.
It doesn’t crumble apart when being cut, and it has no additives to hold it together. It’s all just about the correct natural ingredient ratios and bake time.
I’ve already used this crust for my cottage cheese quiche and my healthy low-carb cheesecake, and it works beautifully for both sweet fillings and savory fillings.
I will show you in the recipe how you can tweak the flavor of the crust very easily to match your filling better.
Once you understand how almond flour behaves, this becomes one of those favorite recipes you’ll come back to again and again. Who doesn’t love a buttery, biscuity crunch underneath their creamy pie filling, right?
Why This Almond Flour Pie Crust Is Different From Other Gluten-Free Pie Crusts
A classic pie crust made with regular flour relies on gluten for structure. That elasticity is what allows traditional pie dough to stretch and roll thin. Many commercial gluten-free pie crusts rely on additives or flours that are not as nutritious as almond flour.
Almond flour contains no gluten, but it’s full of health benefits.
That means:
It doesn’t stretch like traditional pie dough
It browns faster
It contains healthy fats
It relies on compression, not kneading
Unlike a traditional pie crust, this almond flour crust recipe does not require a rolling pin, food processor, pastry blender, cold butter cubes, or plastic wrap.
It’s pressed directly into the pie pan — and that’s what makes it the easiest way to create a gluten-free pie crust at home.
The Type of Almond Flour Matters
The type of almond flour you use makes a difference.
Always choose fine almond flour, not almond meal. A coarser grind creates a more crumbly texture of the crust.
I prefer finely ground almond flour such as Bob’s Red Mill for the best texture and structure.
Simple Ingredients and Tools
You will need at least 2 cups of almond flour, 1 egg, and some fat to bind the flour together.
Yes, you can use melted coconut oil or any oil of your choice if you prefer a dairy-free version.
My recipe is based on butter as it adds a delicious flavor, but you can definitely substitute it.
You will need a 9-inch pie baking dish, preferably the type where you can push the bottom up and out so the pie crust can come out cleanly.
If you don’t have a pie dish with a removable bottom, then tip the pie dish upside down gently once your almond flour pie crust is cool, onto a board. Then tip it back on its bottom onto a baking sheet, so you can now add the filling. Once baked, the pie crust will be sturdy enough to hold the filling without its original pie dish.
Detailed Steps so You Get it Right the First Time
Besides the standard recipe card, I added some detailed steps for you with photos, so it helps you along the way while making this almond flour pie crust. It’s simple, but things need to be precise to avoid disappointment. With my guidance, you’ve got this, my friend!
Step 1: Mix the Dough
In a large bowl, combine the almond flour and salt.
Add the melted butter and egg.
Mix everything with a spatula or wooden spoon till everything combines. You can use your clean hands if the spoon is not quite doing the job.
The dough will look slightly crumbly — this is normal, as long as it sticks together when you press it.
Note: Before putting the dough into the baking pan, make sure to grease it with some butter or oil.
What you’re looking for:
If you squeeze a handful in your palm, it should hold together without cracking apart.
If it doesn’t stick together at all, add 1 teaspoon of melted butter or oil and mix again.
Avoid adding extra egg unless absolutely necessary. Too much moisture can affect the texture of the crust and cause puffing during baking.
Step 2: Press Into the Pie Pan
Lightly grease your 9-inch pie dish. Place your dough in the middle of the pie dish and start pushing and flattening it out towards the edges. Keep going until enough dough is moved towards the edges so you can bring it all the way to the top of the edges.
Shape it with your fingers along the edges by moving the pie dish around as you work on it. Be patient, it’s like playing with Play-Doh. Try to even out the dough as much as possible so it’s similar thickness on the bottom and all the way around.
Use the bottom of a flat measuring cup or glass to compress the base evenly.
Compression is essential. Almond flour crust depends on pressing firmly into shape for structure.
How Thick Should It Be?
Aim for about ½ inch thick (roughly 8 mm). A little thicker is ok, but make sure it’s even and doesn’t have holes.
If the crust is too thick, it can overpower delicate baked fillings like quiche or cheesecake.
For fruit pies, slightly thicker is fine.
Step 3: Chill Before Baking
Place the unbaked crust in the refrigerator for 10–15 minutes.
This helps:
- Reduce puffing
- Stabilize the butter
- Improve the final texture
Step 4: Poke Holes in the Bottom
Use a fork to poke small holes across the bottom of the crust. This step helps prevent air bubbles while baking.
Step 5: Bake the Crust Before Adding Filling
Bake at 340°F (170°C) for 12 minutes.
This step is often called “blind bake” or “blind baking.” It simply means baking the crust on its own before adding filling.
You are looking for:
- Light golden brown crust edges
- A matte surface
- A just-set center
Do not bake until deeply golden brown.
Almond flour contains natural oils. If it’s over-toasted, it can develop a slightly bitter flavor.
In my testing, baking longer than 12 minutes caused the crust to dry out slightly after the second bake with the filling, so 12 minutes was the sweet spot.
Your oven might be a bit different, so check at 12 minute mark and if you feel it needs another 3-5 minutes, let it bake a little longer. Pull it earlier than you think.
What If the Center Lifts?
Even after poking holes, the center may dome slightly during baking. This is normal. While still warm, gently press it down using the bottom of a glass.
It will flatten without cracking, because it’s still pliable while warm.
Let It Cool Slightly Before Filling
Allow the crust to cool for about 15 minutes before adding filling.
It should be warm, not hot, especially if you are making quiche, as I did. Other fillings like apples or pumpkin might be ok to add right away. But anything with eggs and cheese is best to wait a little.
Add your bake fillings and return to the oven.
How To Use This Almond Flour Crust Recipe
This neutral almond flour crust recipe works for:
- Cottage cheese quiche
- Cheesecake
- Pumpkin pie
- Apple pie
- Key lime pie
- Sweet pies
- Savory pies
You can use it for par-baked crusts or even leave it as an unbaked crust for certain no-bake fillings.
Once you dial in your oven timing, it becomes a perfect recipe to build on.
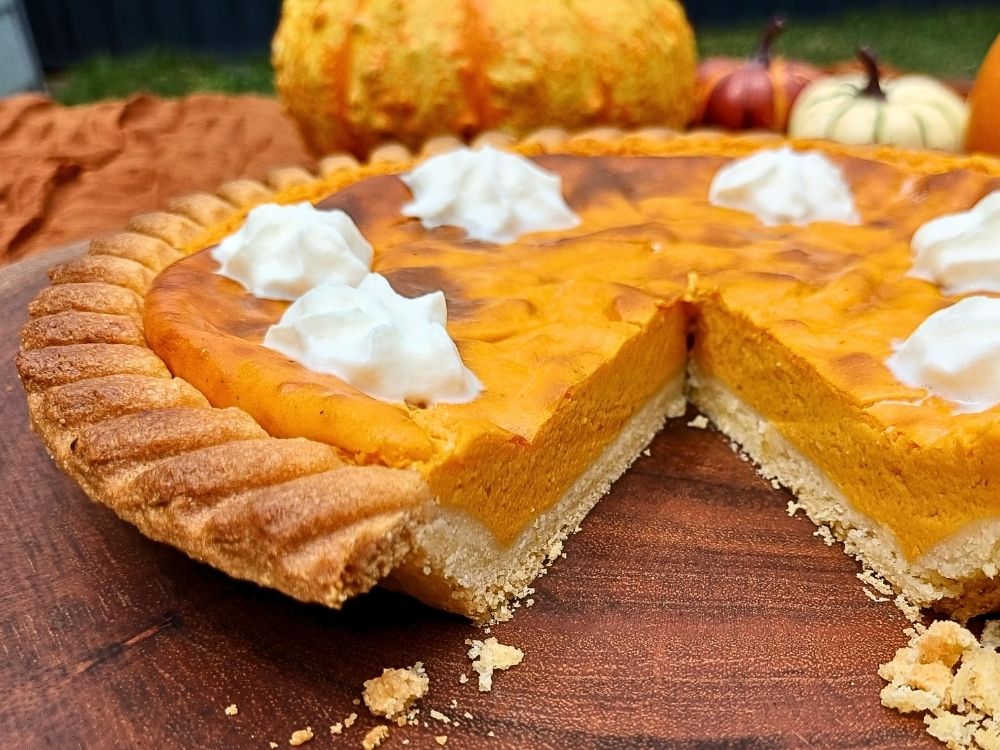
Almond Flour Pie Crust for Savory or Sweet Pies: (GF, Keto)
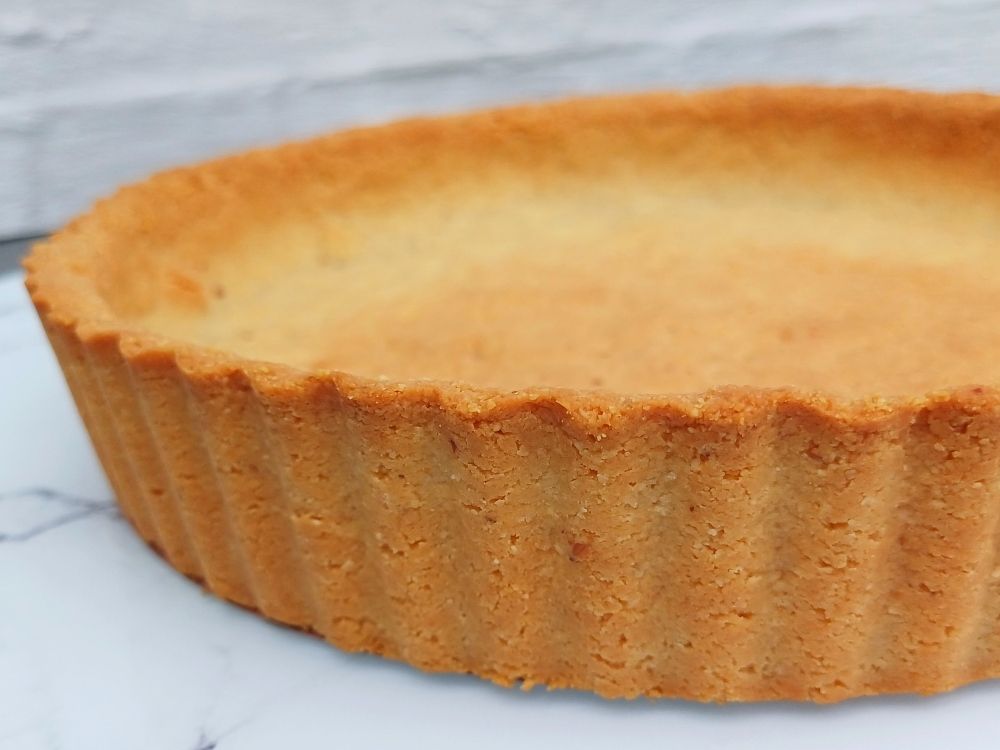
Equipment
Ingredients
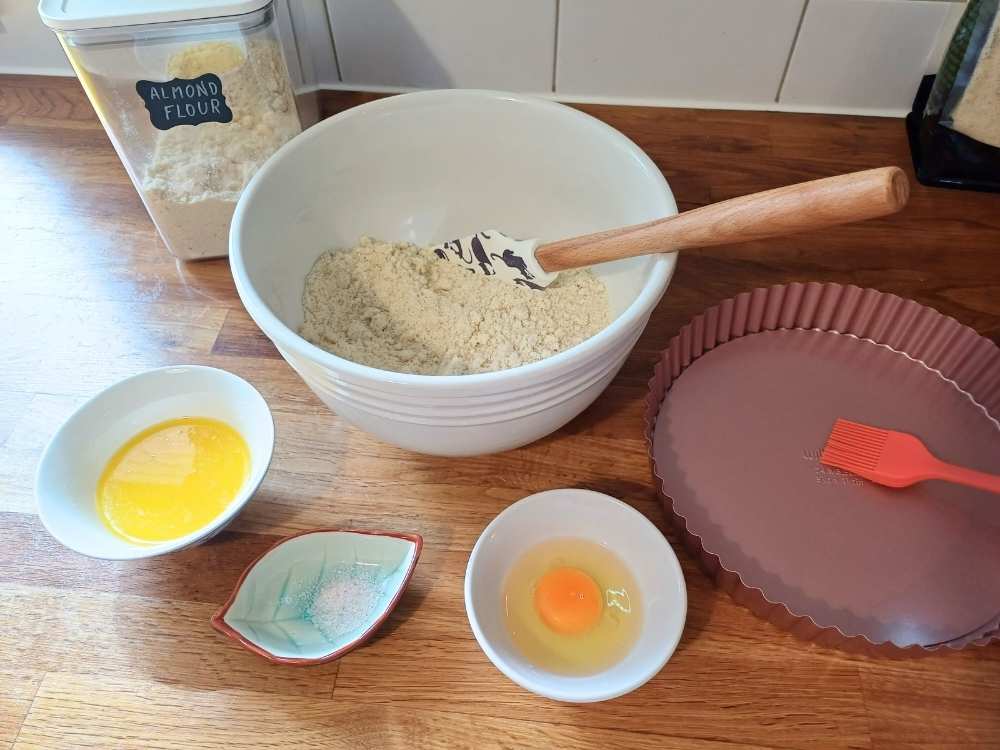
- 2¼ cups fine almond flour
- ½ teaspoon salt
- 1 large egg
- 4 tablespoons melted unsalted butter or olive oil or coconut oil if you want dairy free
Instructions
- Preheat oven to 340°F (170°C).
- Grease the pie dish with 1 tablespoon of melted butter. It can be rough; just dip the brush in the main bowl.
- Combine almond flour and salt in a large mixing bowl.
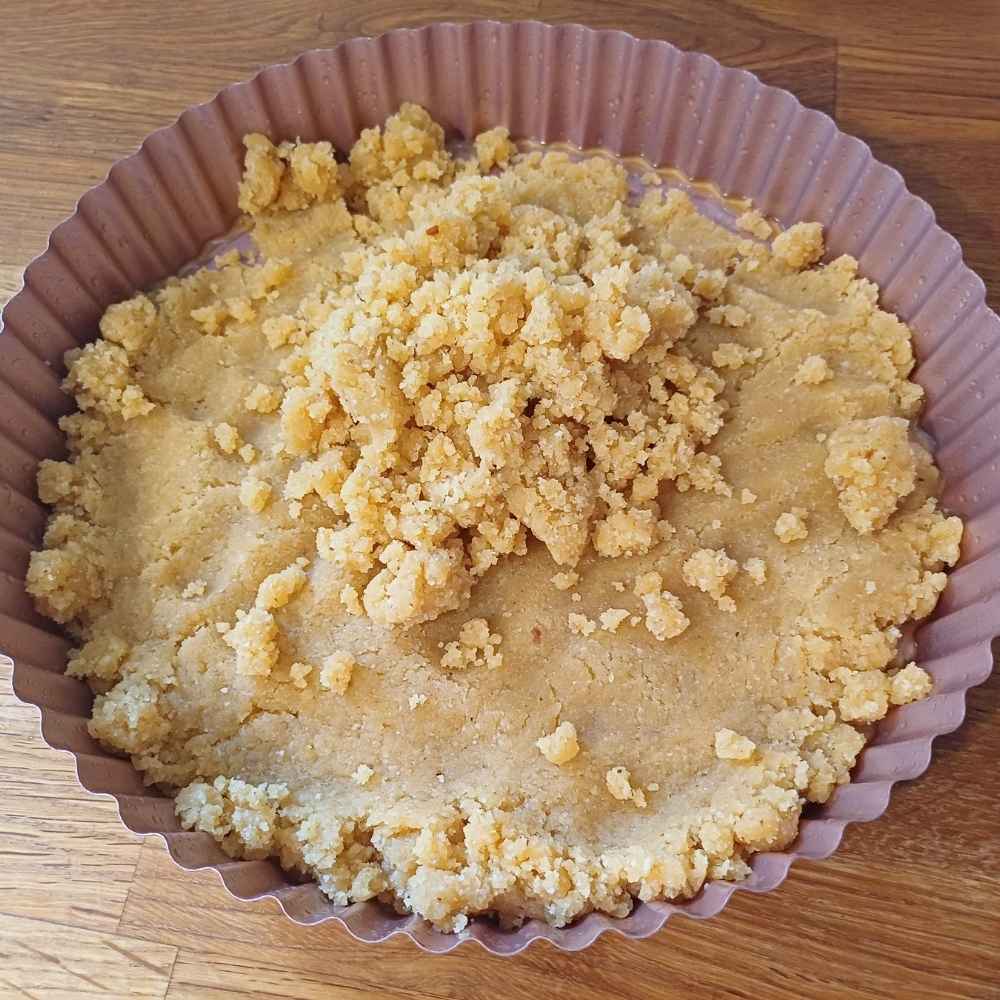
- Add the remaining melted butter and egg. Stir until the dough holds together when pressed. Use your hands if needed to mix properly.
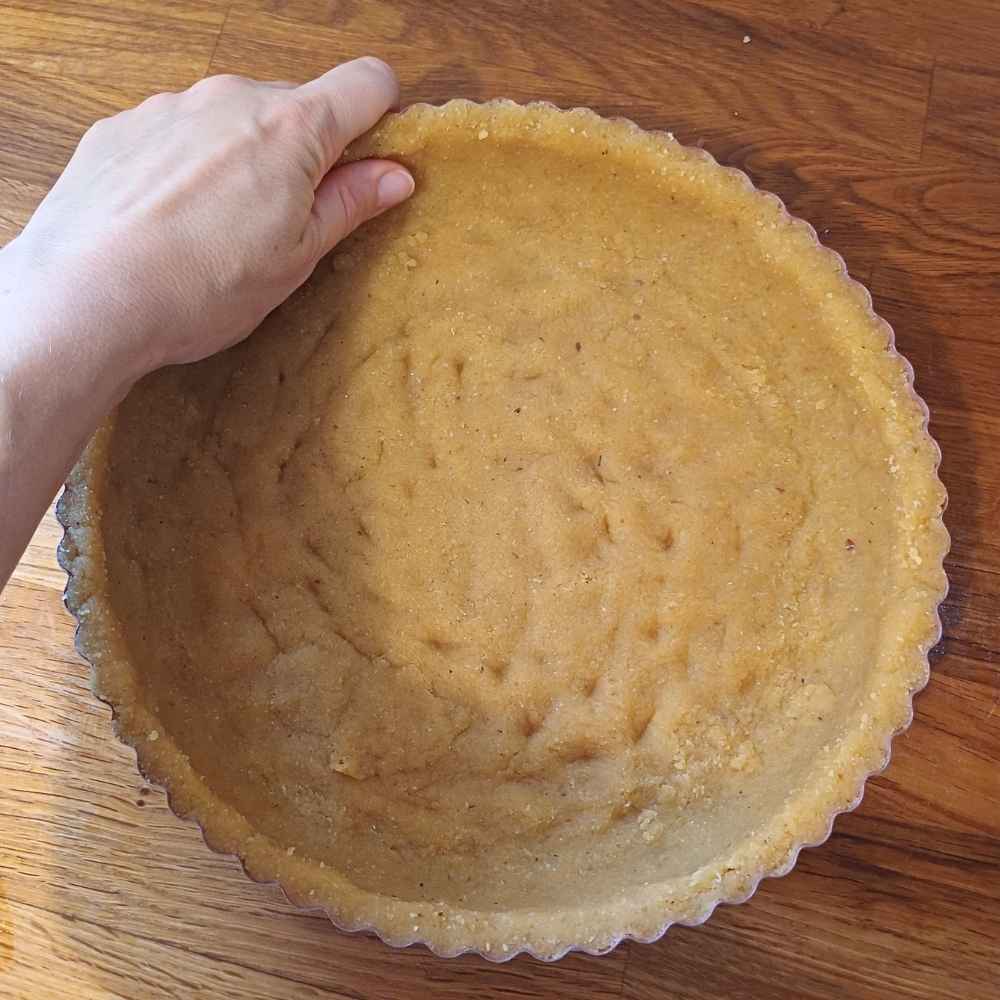
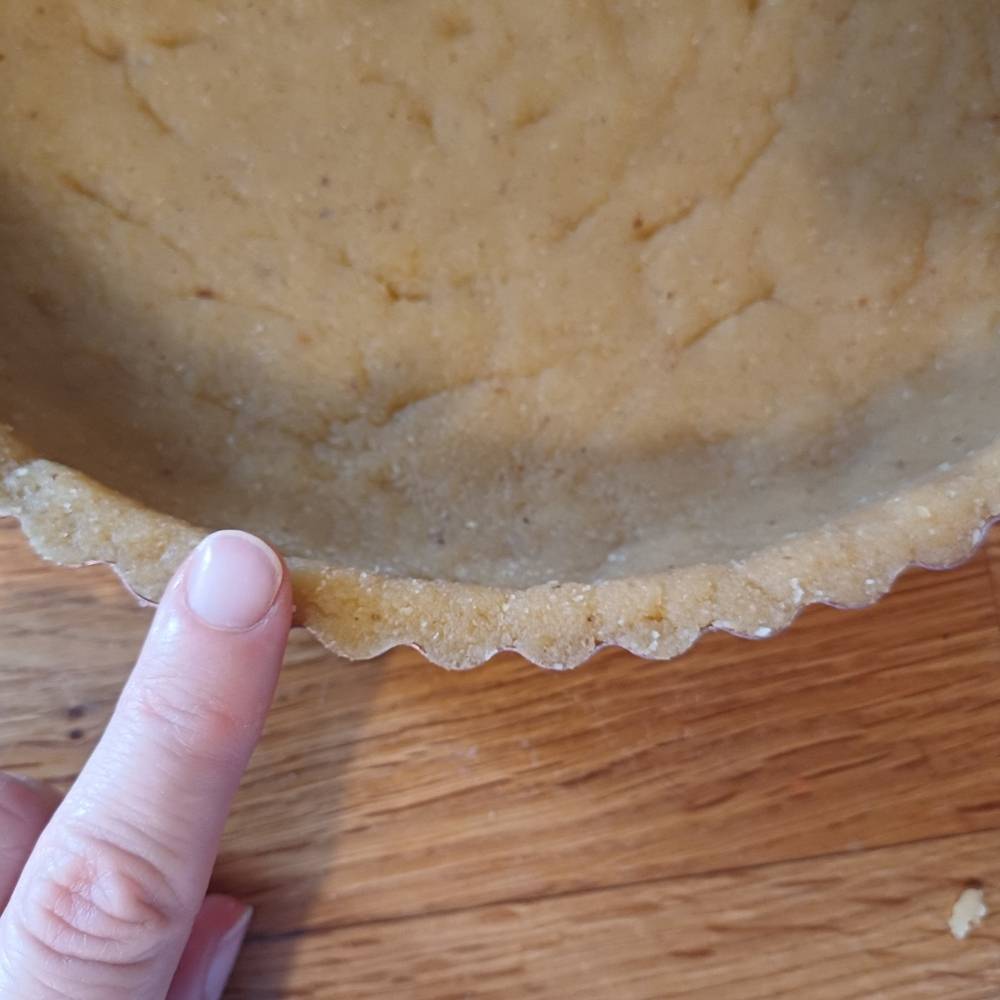
- Press and shape firmly into a greased 9-inch pie plate, until the pie filling completely coats the inside of the pie dish inscluding the sides.
- Refrigerate 10–15 minutes.
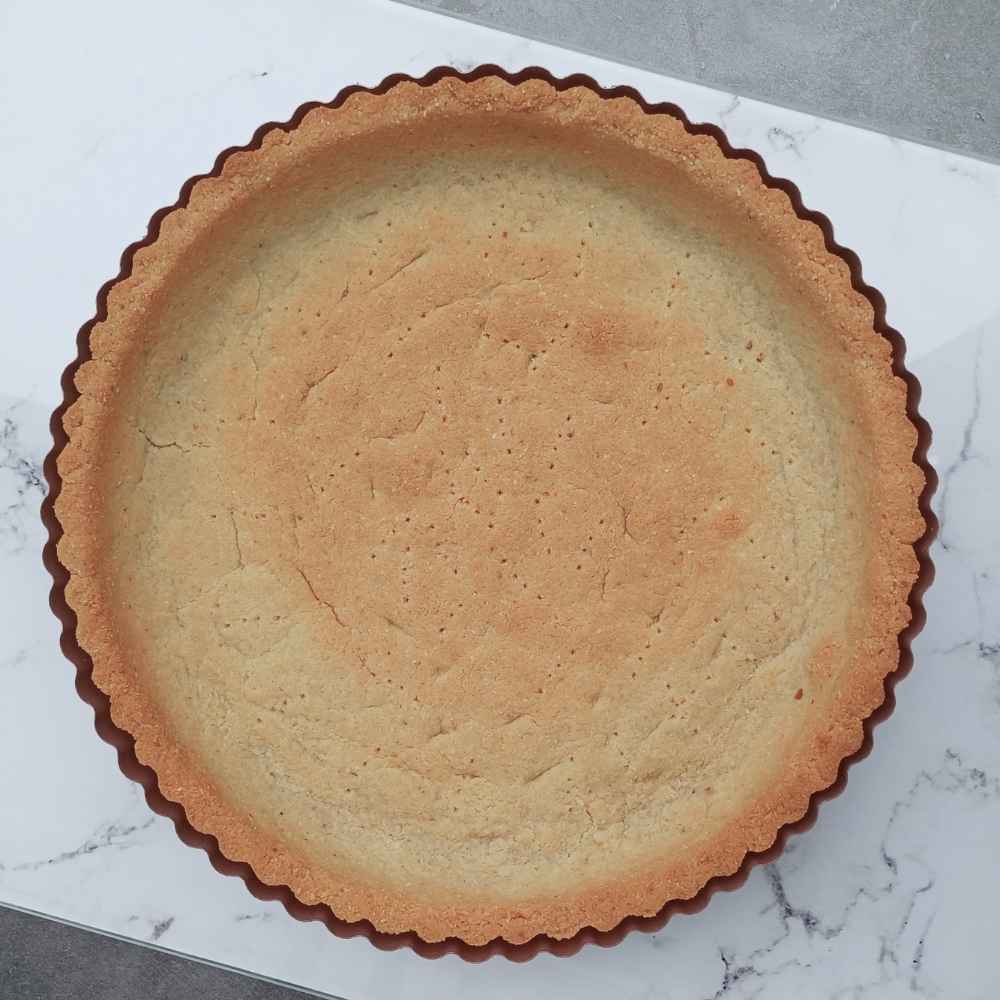
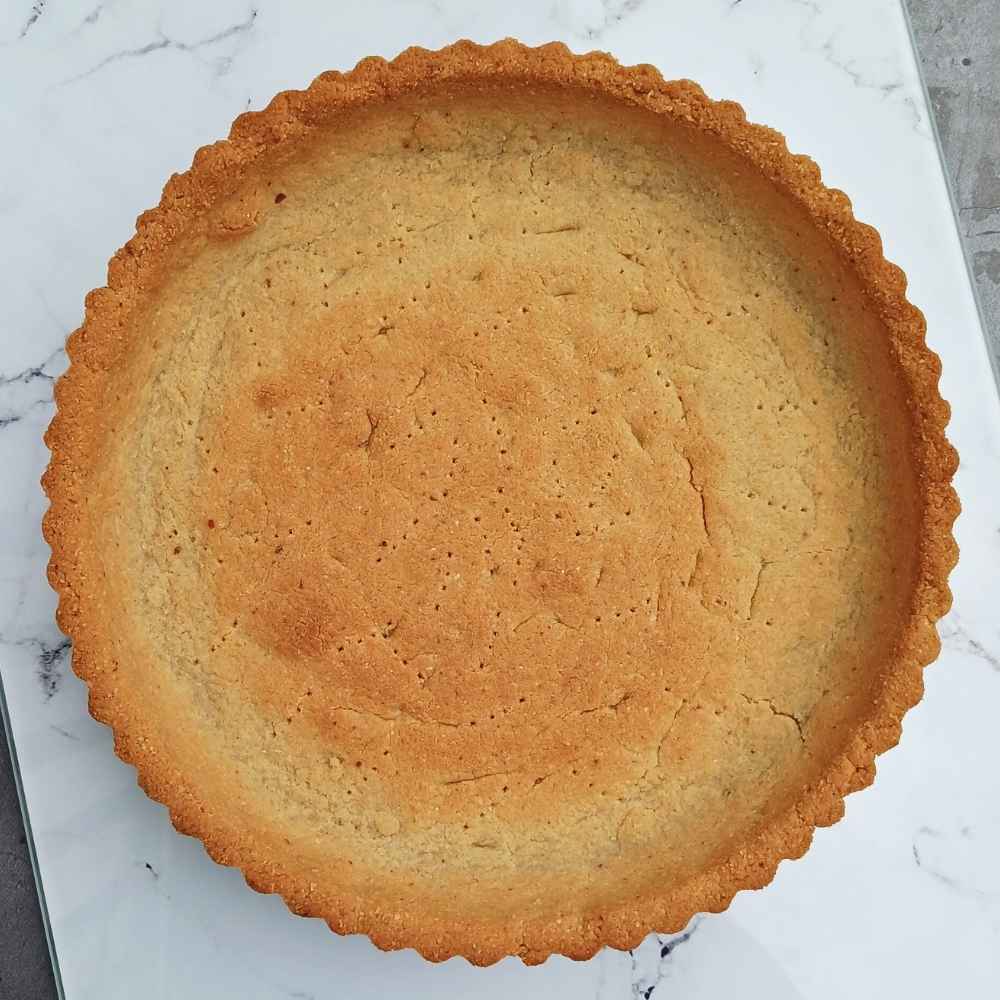
- Use a fork to poke small holes in the bottom.
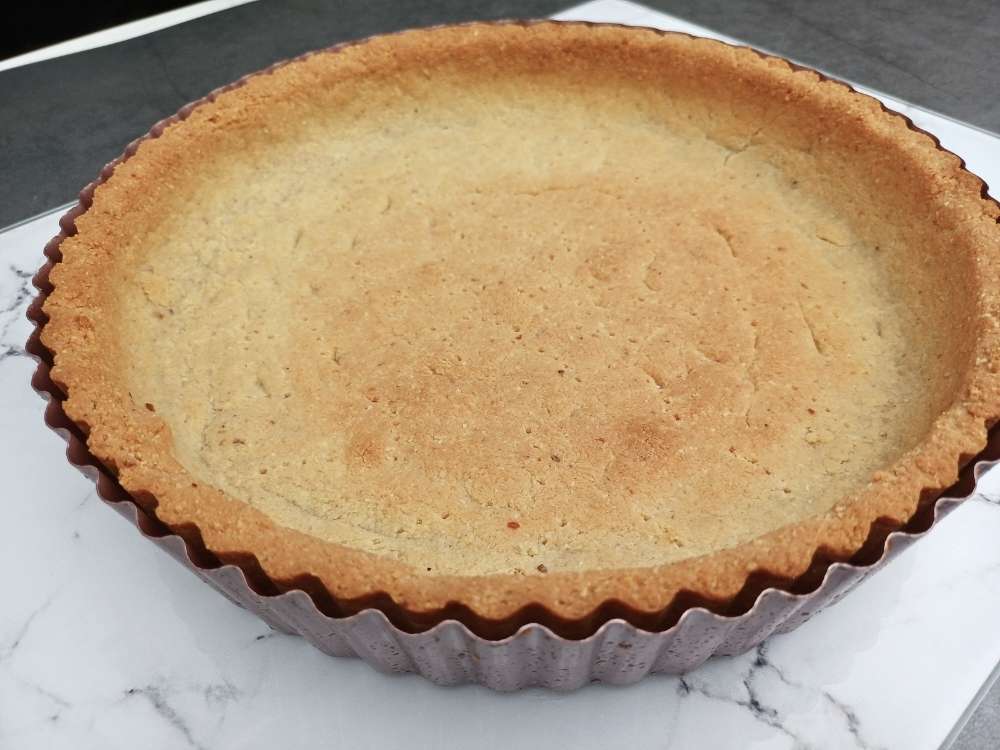
- Bake for 12 minutes until lightly golden. It should not look fully baked yet, unless you are using a no-bake filling. If you are, then bake for 18 minutes in total, until the pie crust is fully baked through. For example, for a no-bake cheesecake.
- Cool slightly before adding filling. If adding egg-based or cream-based filling, let the pie crust cool completely. Hot pie crust might separate the eggs and cream.
Notes
Nutrition
As an Amazon Associate, I earn from qualifying purchases. This means that if you click on an Amazon link and make a purchase, I may receive a small commission at no additional cost to you. I only recommend products I genuinely believe in and personally use or have thoroughly researched.
FAQs
Can almond flour be used for pie crust?
Yes. Almond flour works very well for pie crust, especially for a gluten-free diet or low-carb baking. The key is pressing it firmly into the pie pan rather than rolling it like traditional pie dough.
What are the common mistakes when using almond flour?
The most common mistakes include:
- Over-baking until too golden brown
- Making the crust too thick
- Adding too much egg
- Not compressing the dough firmly
Because almond flour contains healthy fats, it browns quickly and requires a moderate oven temperature.
What is the secret to baking with almond flour?
The secret is managing moisture and bake time. Almond flour does not need kneading. It needs firm compression and controlled heat. Pull it from the oven when lightly golden — not deeply toasted.
Is there a downside to almond flour?
Almond flour is higher in fat and calories than regular flour. It also browns faster and can taste bitter if over-baked.
It’s also more expensive than regular flour or other gluten-free flour types. But the nutritional value makes it worth it.


